Source code is added to the project using the Visual Source Safe Explorer on the client.
Log in using an account that can add and checkout files from the project database, and select the project created previously.
Using Windows Exploer, select and drag the directories that UD6/CMtool Driver has created your Uniface source code in, to the Visual SourceSafe explorer window (e.g.: applications, components etc etc).

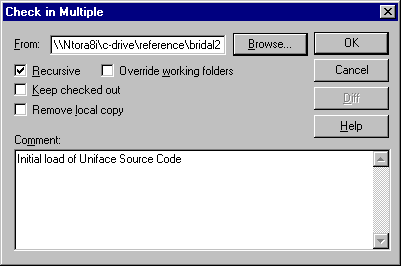
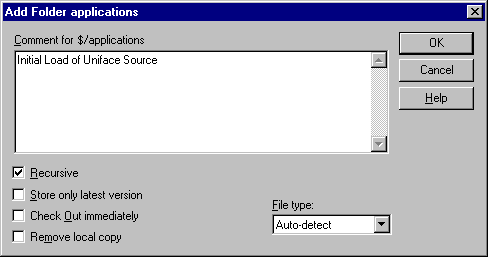
This window will appear, giving you the opportunity to add a comment regarding the checkin. Ensure that the Recursive checkbox is ticked, and a descriptive comment is given, then press OK.

Since Visual SourceSafe has been set to use a shadow folder, but that folder does not exist yet, the above error dialog is presented. Press Yes All to automaticaly create the shadow folders.
As each sub-directory is added you will be prompted for the checkin comment. Ensure that the ‘recursive’ checkbox is ticked each time.
On the server you should see that the shadow folder is being populated at the same time as the project.
Taking control
Set SourceSafe Options
Create SourceSafe Project
Set Shadow Folder
Add source code to Project
Set working folder(s)
How to use the driver with Visual SourceSafe (cont.)
Configuration information
Taking control in Visual SourceSafe
Releasing a form using Visual SourceSafe
Checking a form in using Visual SourceSafe
Adding a form using Visual SourceSafe
Finding the differences in versions using Visual SourceSafe
Problems when using Visual SourceSafe
UD6 Overview
A methodology to Uniface source code control
Using UD6/CMtool and Uniface with Visual SourceSafe.
| $Revision: 1.11 $ $Date: 2011/02/28 02:56:33 $ | [go to top] |