Step by Step guide to using UD6/CMtool Driver with
CVS
The Concurrent Versions System is
a front end to the RCS revision control system which is similar
to but is often considered to be better than, SCCS (e.g.: RCS baselines
the most recent version and keeps deltas for earlier ones). It is
freely available from the Free Software Foundation (GNU), and redistributed
by a number of vendors.
CVS extends the notion of revision control from a collection
of files in a single directory to a hierarchical collection of directories
each containing revision controlled files.
Directories and files in the CVS system can be combined together
in many ways to form a software release. CVS provides the functions
necessary to manage these software releases and to control the concurrent
editing of source files among multiple software developers.
There are two ways to run CVS on Windows 95/NT. The first is as
a client, talking to a CVS server on a unix box. This is the recommended
setup and is commonly used.
The second way is known as "local" or "non-client/server"
CVS. This lets you run CVS if you have only Windows machines, and
will be the way described here. We do not recommend this technique
be used in a production environment, but that you use Polyserver
and CVS Server instead, however the software and principles are
the same either way.
The home of CVS on the web is http://www.loria.fr/~molli/cvs-index.html
.
A complete set of GNU software can be found at ftp://prep.ai.mit.edu/pub/gnu/
.
If you have not already done so, please read A
methodology to Uniface source code control before you continue
with these topics and examples.
How to get and install CVS
A CVS version has been bundled with the March Hare UD6/CMTOOL Driver.
It should be installed in your Uniface directory in a sub-directory
called CVS. If it is not there, the option to install it may not
have been selected during installation.
As with all GNU solutions, source code for CVS is freely available
from the net, and a few web sites also have pre-compiled binaries.
If you are looking for Linux or other Unix ports use these same
links then explore from there, the Unix ports are usually fairly
close by.
I have used source code and documentation downloaded from:
http://download.cyclic.com/pub/cvs-1.10/
And the pre-compiled binary downloaded from:
http://download.cyclic.com/pub/cvs-1.10/windows/
The Microsoft-Help version of the documentation came from:
http://www.fido.de/~kama/cvs-en.html
In addition to these you may wish to download GNU DIFF and RCS from:
http://download.cyclic.com/pub/rcs/
WinZip was used to extract the files from the tar.gz format onto
a shared network drive s:\.
Configuration Information
The Windows-NT version of CVS does not support a CVS server, so
polyserver was not used. Instead the UD6/CMTOOL files were stored
on a network drive (p:\nettest\) in the following directories:
p:\nettest
p:\nettest\sources
p:\nettest\sources\applications
p:\nettest\sources\components
p:\nettest\sources\globals
p:\nettest\sources\glyphs
p:\nettest\sources\menus
p:\nettest\sources\other
p:\nettest\sources\registers
p:\nettest\sources\subsystems
p:\nettest\sources\sub-types
p:\nettest\sources\tables
p:\nettest\sources\templates
p:\nettest\sources\type-libraries
The following sections give the complete text of the configuration
files used. The CVS and misc section covers some of the technicalities
of the CVS installation and references the CVS documentation. The
CVS installation is covered in more simple terms in the sections
Taking control, Releasing a form, etc. etc.
Configuration Files - Joins File
UFORM:ULABEL:.\sources\components\* UXGROUP:UFORM:UFORM
UXFIELD:UFORM:UXGROUP UXREGS:U_FORMLIB:UFORM UCTABLE:U_VLAB,U_TLAB:.\Sources\tables\*
UCKEY:U_VLAB,U_TLAB:UCTABLE UCFIELD:U_VLAB,U_TLAB:UCTABLE UCGROUP:U_GLAB,U_VLAB:.\sources\sub-types\*
UCRELSH:U_GLAB,U_VLAB:UCGROUP USOURCE:USUB,UVAR,ULAN:.\sources\globals\*
UAPPL:ULABEL:.\sources\applications\* UAPLFRM:ULABEL:UAPPL USIMPL:UIMPLNAM:UFORM
USILINK:UIMPLNAMCAL:USIMPL USIMPKW:UIMPLNAM:USIMPL USIOPER:UIMPLNAM:USIMPL
USIPARM:UIMPLNAM:USIMPL USSPEC:USPECNAM:UFORM USLINK:USPECNAMCAL:USSPEC
USOPER:USPECNAM:USSPEC USSPCKW:USPECNAM:USSPEC USPARM:USPECNAM:USSPEC
USMENU:UMENU,UVAR,ULAN:.\sources\menus\* USITEM:UMENU,UVAR,ULAN:USMENU
UGREGS:U_FORMLIB:.\sources\registers\* USICPLB:UTLBNAM:.\sources\type-libraries\*
USILBCP:UTLBNAM:USICPLB USILBSS:UTLBNAM:USICPLB UGGIF:U_MLAB:.\sources\templates\entity-interface\*
UGFIF:U_MLAB:.\sources\templates\field-interface\* UGFLAY:U_MLAB:.\sources\templates\field-layout\*
UGFSYN:U_MLAB:.\sources\templates\field-syntax\* UTPLFLD:TEMPLATENAME:.\sources\templates\field\*
UTPLFRM:TEMPLATENAME:.\sources\templates\component\* UTPLGRP:TEMPLATENAME:.\sources\templates\entity\*
USUBS:SUBSYSTEM:.\sources\subsystems\* UGLYPH:USUB,UCLABEL,UVAR:.\sources\glyphs\*
Configuration Files - ASN File
An assignment file was set up to redirect the other entities, as
follows:
[PATHS]
$UD6 UD6:
$DEF $DB3
$SYS $DEF
$UUU $DEF
$IDF $UD6
[ENTITIES]
*.sysenv usys:*.*
*.dict $IDF:.\sources\other\*.*
;
; Dont store temporary data in XML
USTMP.DICT $uuu:USTMP.*
ULANA.DICT $uuu:ULANA.*
;
; Final catch-all for IDF dictionary
*.dict $idf:.\sources\other\*.*
[DRIVER_SETTINGS]
USYS$UD6_PARAMS=listdir h:\sources\inuse
This assumes a current working directory of the top of the 'reference'
area of the CM tool.
WARNING: If you have a USYS$UD6_PARAMS specified
in both a local ASN file and the usys.asn file, the settings in
the usys.asn file override the local assignment file.
Configuration Files - CVS and Misc
CVS itself was installed onto the shared network drive S:\
The remainder of this section covers some of the technicalities
of the CVS installation and references the CVS documentation. The
CVS installation is covered in more simple terms in the sections
Taking control, Releasing a form, etc etc.
Before controlling the Uniface source code in CMTOOL format the
following directory tree existed.
p:\nettest
p:\nettest\sources
p:\nettest\sources\applications
p:\nettest\sources\components
p:\nettest\sources\globals
p:\nettest\sources\glyphs
p:\nettest\sources\menus
p:\nettest\sources\other
p:\nettest\sources\registers
p:\nettest\sources\subsystems
p:\nettest\sources\sub-types
p:\nettest\sources\tables
p:\nettest\sources\templates
p:\nettest\sources\type-libraries
The 'Sources' directory was renamed 's' for the cvs import operation.
p:\nettest
p:\nettest\s
p:\nettest\s\applications
p:\nettest\s\components
p:\nettest\s\globals
p:\nettest\s\glyphs
p:\nettest\s\menus
p:\nettest\s\other
p:\nettest\s\registers
p:\nettest\s\subsystems
p:\nettest\s\sub-types
p:\nettest\s\tables
p:\nettest\s\templates
p:\nettest\s\type-libraries
The cvs operations were performed from the p:\nettest\s directory.
The cvs import operation effectively re-created the p:\nettest\sources
directory tree under configuration control. Please read the CVS
README topic, which describes this CVS installation process.
The final result was:
p:\nettest
p:\nettest\s
p:\nettest\s\applications
p:\nettest\s\components
p:\nettest\s\globals
p:\nettest\s\glyphs
p:\nettest\s\menus
p:\nettest\s\other
p:\nettest\s\registers
p:\nettest\s\subsystems
p:\nettest\s\sub-types
p:\nettest\s\tables
p:\nettest\s\templates
p:\nettest\s\type-libraries
p:\nettest\sources
p:\nettest\sources\applications
p:\nettest\sources\components
p:\nettest\sources\globals
p:\nettest\sources\glyphs
p:\nettest\sources\menus
p:\nettest\sources\other
p:\nettest\sources\registers
p:\nettest\sources\subsystems
p:\nettest\sources\sub-types
p:\nettest\sources\tables
p:\nettest\sources\templates
p:\nettest\sources\type-libraries
p:\nettest\sources\cvsroot
Then the 'additional' directory tree 'p:\nettest\s' was removed.
Taking Control
As a way of introducing CVS, we'll go through a typical work-session
using CVS. . The first thing to understand is that CVS stores all
files in a centralized repository (see section The Repository);
this section assumes that a repository is set up (see previous section).
Before loading your source into a configuration management tool,
it is wise to compile all objects and forms, e.g.:
$idf /all
This ensures that all the descriptors have been generated for the
forms. Without this information you will not be able to compile
forms in the CM tool since they will be read-only and the descriptors
cannot be generated (see the nodeny parameter in the USYS$UD6_PARAMS
help topic).
For the same reasons you may wish to start up the IDF and select
the Assembly Area, then the Assembly Workbench.
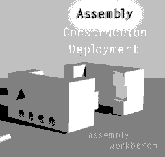
Clicking on this ICON will start the initial synchronisation of
signatures and diagram.
Taking Control - Import to the CM tool
The 'Sources' directory was renamed 's' for the cvs import operation.
This is to make room for the CVS repository which will be created
using the original names.
p:\nettest
p:\nettest\s
p:\nettest\s\applications
p:\nettest\s\components
p:\nettest\s\globals
p:\nettest\s\glyphs
p:\nettest\s\menus
p:\nettest\s\other
p:\nettest\s\registers
p:\nettest\s\subsystems
p:\nettest\s\sub-types
p:\nettest\s\tables
p:\nettest\s\templates
p:\nettest\s\type-libraries
In this example we have installed CVS onto s:\ (a shared network
drive). This directory must be added to the PATH that windows uses
to find executable programs, and another environment variable must
be created to indicate where the CVS repository will be created.
You can execute these commands from the DOS prompt or insert it
into your autoexec.bat file (for Windows 95/98) or use the system
control panel in Windows NT to update the PATH environment variable.
set PATH=S:\;%PATH%
set CVSROOT=:local:p:\nettest\controlled_sources
The following cvs operations were performed from the p:\nettest\s
directory.
p:
cd p:\nettest\s
cvs -d :local:p:\nettest\controlled_sources init
cvs import -m "Initial import" . Trunk unifaceapp_1_0
Taking Control - Creating a reference
copy
The cvs import operation effectively re-creates the p:\nettest\sources
directory tree under configuration control. However in addition
to requiring a 'checked in' version, we also require a machine readable
(or 'reference') copy of the source code.
If this was not done, even though you may be able to read the 'form'
you are working on, you could not reference the application model
definitions or include procs etc. Some source code managers (like
PVCS) automatically can create a reference directory, however CVS
and many others can be 'taught' to (see Keeping a checked out copy
in the cvs help file).
To create an initial read-only checked out copy, execute the following
commands:
p:
md p:\nettest\source
cd p:\nettest\source
cvs -r checkout .
Taking Control - Keeping the reference
copy up to date
This reference area or checked out area must always be kept up
to date with the most recent committed copy of the source code.
It is also possible to keep several of these, perhaps for source
code at different 'levels'.
Secondly the UD6/CMTOOL driver needs to know where files are being
kept that are NOT in the 'reference' area. A configuration file
called inuse (the filename and directory that this file is kept
in can be specified in the assignment file, see the parameter listdir
in the USYS$UD6_PARAMS help topic).
To simplify these two actions that need to take place at check-in,
March Hare Pty Ltd provide 2 utilities for automating these tasks,
add2list.exe and del2list.exe.
Taking Control - Updating INUSE and the
reference copy on update
Modify the loginfo file to include a single line:
ALL del2list.exe -j~ h:\sources\inuse ~h:\sources
%s~ 2 . cmd /c scvs p: \nettest\sources -r -q update -d
(For Windows 95 use command.com instead of cmd.exe)
Now in future when source code is checked out, the reference area
will be kept up to date, and when a developer checks source code
in the inuse file will be kept up to date. The svcs.bat file that
it triggers the execution of is listed below:
@echo off
%1
cd %2
cvs %3 %4 %5 %6 %7 %8 %9
Taking Control - Updating INUSE and the
reference copy on checkout
However, just to complicate the issue, CVS does not have a similar
mechanism for triggering an event on checkout. So on NON-WINDOWS
platforms the cvswrappers file is used, modify it with a single
line:
* -f 'add2list.exe inuse %()\%s %s'
On WINDOWS platforms the cvswrappers -f option is not supported,
so use a batch/shell script similar to:
@echo off
FOR %%Y in (%1 %2 %3 %4 %5 %6 %7 %8 %9) DO IF %%Y~==checkout~
GOTO addit
FOR %%Y in (%1 %2 %3 %4 %5 %6 %7 %8 %9) DO IF %%Y~==release~ GOTO
delit
:cvs
cvs %1 %2 %3 %4 %5 %6 %7 %8 %9
goto end
:addit
add2list inuse .\sources\%2 :cwd:%2
GOTO cvs
exit
:delit
GOTO cvs
exit
:end
If you are going to use this batch file, be sure to use it in
later examples and not CVS directly. If you name the batch file/shell
script cvs.bat the cvs.exe will actually be executed first, so March
Hare recommend giving your batch file a different name (like bcvs.bat)..
Releasing a form
As a way of introducing CVS, we are continuing to go through a
typical work-session using CVS. . In the previous section we set
up a repository, and now in this section we will check out a form.
First go to some other directory than the one where you imported
the sources, then check out a new copy of them from the repository
(in this example h: is the developers personal drive):
h:
md h:\sources
cd h:\sources
bcvs checkout components\formname.XML
This will make the directory "uform" in your current
directory and populate it with the appropriate source XML file.
This new directory tree is called a "working copy" of
the sources; after you've made changes to them, you can "commit"
them back into the master repository.
You should also find an inuse file in your current directory. This
is a file that the UD6 driver uses to find the current location
of a source file NOT in the main CVS repository/reference area.
If you do not have an inuse file, check your assignment file settings
((the filename and directory that this file is kept in can be specified
in the parameter listdir in the USYS$UD6_PARAMS), and CVS configuration
help topics Configuration information and Taking control,.
Checking a form in
Now that we have our new copy of the form, you may make changes
to it (remember that the source files in the reference area are
read-only). Add a comment to the form that you checked out earlier.
To put this source back into the repository you might then run
this CVS command:
cvs commit -m "Added comment about parsley."
components\formname.xml
The "-m" flag records the log message it precedes as
part of M-USYS-USA.XML 's history. Later, you could go back and
read over the various log messages of M-USYS-USA.XML (see cvs.html
or the CVS Help for details).
NOTE 1: cvs does not delete the components\formname.xml file from
the local developers disk automatically, however since the inuse
file has been updated, Uniface will resume looking at the central
'reference' area for the file.
NOTE 2: If you enter an operating system command prefixed by an
!, into the SQL Workbench, with PATH specified as $UD6, then the
string will be passed to the operating system, e.g.:
!bcvs checkout components\add001.XML
Releasing a form and application model
Usually when you are fixing/writing Uniface forms/components you
need more than just the form, you need parts of the application
model as well.
To check out the form and the entity (all fields are automatically
checked out with the entity), and the sub-type (every entity has
at least 1 subtype), first go to your developers directory.
Remember from the previous example that the developer's directory
is some directory other than the one where you imported the sources.
Check out a new copy of the form, table (entity) and sub-type (group)
from the repository (in this example h: is the developers personal
drive):
h:
cd h:\sources
bcvs checkout components\formname.XML
bcvs checkout tables\schema-tablename.XML
bcvs checkout sub-types\tablename-schema.XML
NOTE: bcvs is the name of the batch file/shell script we created
in an earlier step.
Releasing Registers
How you check out global registers will depend partially on how
you have set up your joins file. By default the joins file is set
up to store all the global registers for a library in one file.
To see how to change this read the Guide to Installing UD6/CMtool
driver.
Remember from the previous examples that the developer's directory
is some directory other than the one where you imported the sources.
Check out a new copy of the form, table (entity) and sub-type (group)
from the repository (in this example h: is the developers personal
drive):
h:
cd h:\sources
bcvs checkout registers\library-name.XML
NOTE: bcvs is the name of the batch file/shell script we created
in an earlier step.
Adding a form
Creating a brand new form / service / report that has never existed
before is a special case in a Configuration Managed environment.
When Uniface is using the UD6/CMTOOL driver it will always assume
that if a 'file' does not exist in the 'reference area', then it
does not exist.
This also applies to a new table / sub-type / library etc, but
not a new register, field etc since these exist 'within' an existing
entity.
So the easiest way to create a new form, is to copy an existing
form file, remove its contents apart from the header and footer,
check it in to CVS and then check it out and use it as normal
e.g.:
New.xml contains:
<?xml version="1.0"?>
<uniface_schema >
</uniface_schema>
To put this source into the repository run this CVS command:
md new
md components
copy \new.xml .
cd ..
cvs import -m "Initial import" . Trunk unifaceapp_1_0
NOTE: The import command in CVS always imports an entire tree,
so be sure to create the tree empty.
The form can then be checked out and worked on as described previously
Differences
One of the most powerful features of a CM tool is it allows you
to find out WHO made WHAT change. CVS includes a diff function to
assist with this task.
The following line produces a Unidiff (-u flag) between revision
1.14 and 1.19 of backend.c. Due to the -kk flag no keywords are
substituted, so differences that only depend on keyword substitution
are ignored.
$ cvs diff -kk -u -r 1.14 -r 1.19 backend.c
Final Notes
These notes have been designed to give Uniface administrators and
developers a quick start into the use of configuration management.
However it is a large subject, and almost every site will want their
development to happened slightly differently.
We chose CVS as a tool to demonstrate with because it has most
of the functions of the larger commercial packages, and demonstrates
nicely how to 'overcome' problems, like the reference copy.
UD6/IDF-XML driver will operate with all CM tools, due to its open
and simple architecture.
Since the UD6/CMTOOL driver comes with complete source code, for
ud6, as well as add2list and del2list, you can easily make your
own enhancements or contract March Hare to make them for you. We
expect that users of other CM tools may wish to suggest other options
and functionality for the add2list and del2list programs that make
their life easier.
|

